

New blog: Our kitchen
From a purple and dark kitchen
to a light and bright one!
I'm so excited to announce that our kitchen is finally complete! I can't help but smile and feel incredibly grateful as I write this. We went from having a purple and dark kitchen to one that is now bright and full of light. The journey wasn't easy, as we didn't have a functional kitchen for a few months, but it was definitely worth it. This experience even inspired me to write a survival guide for kitchen renovations. Buy it here!

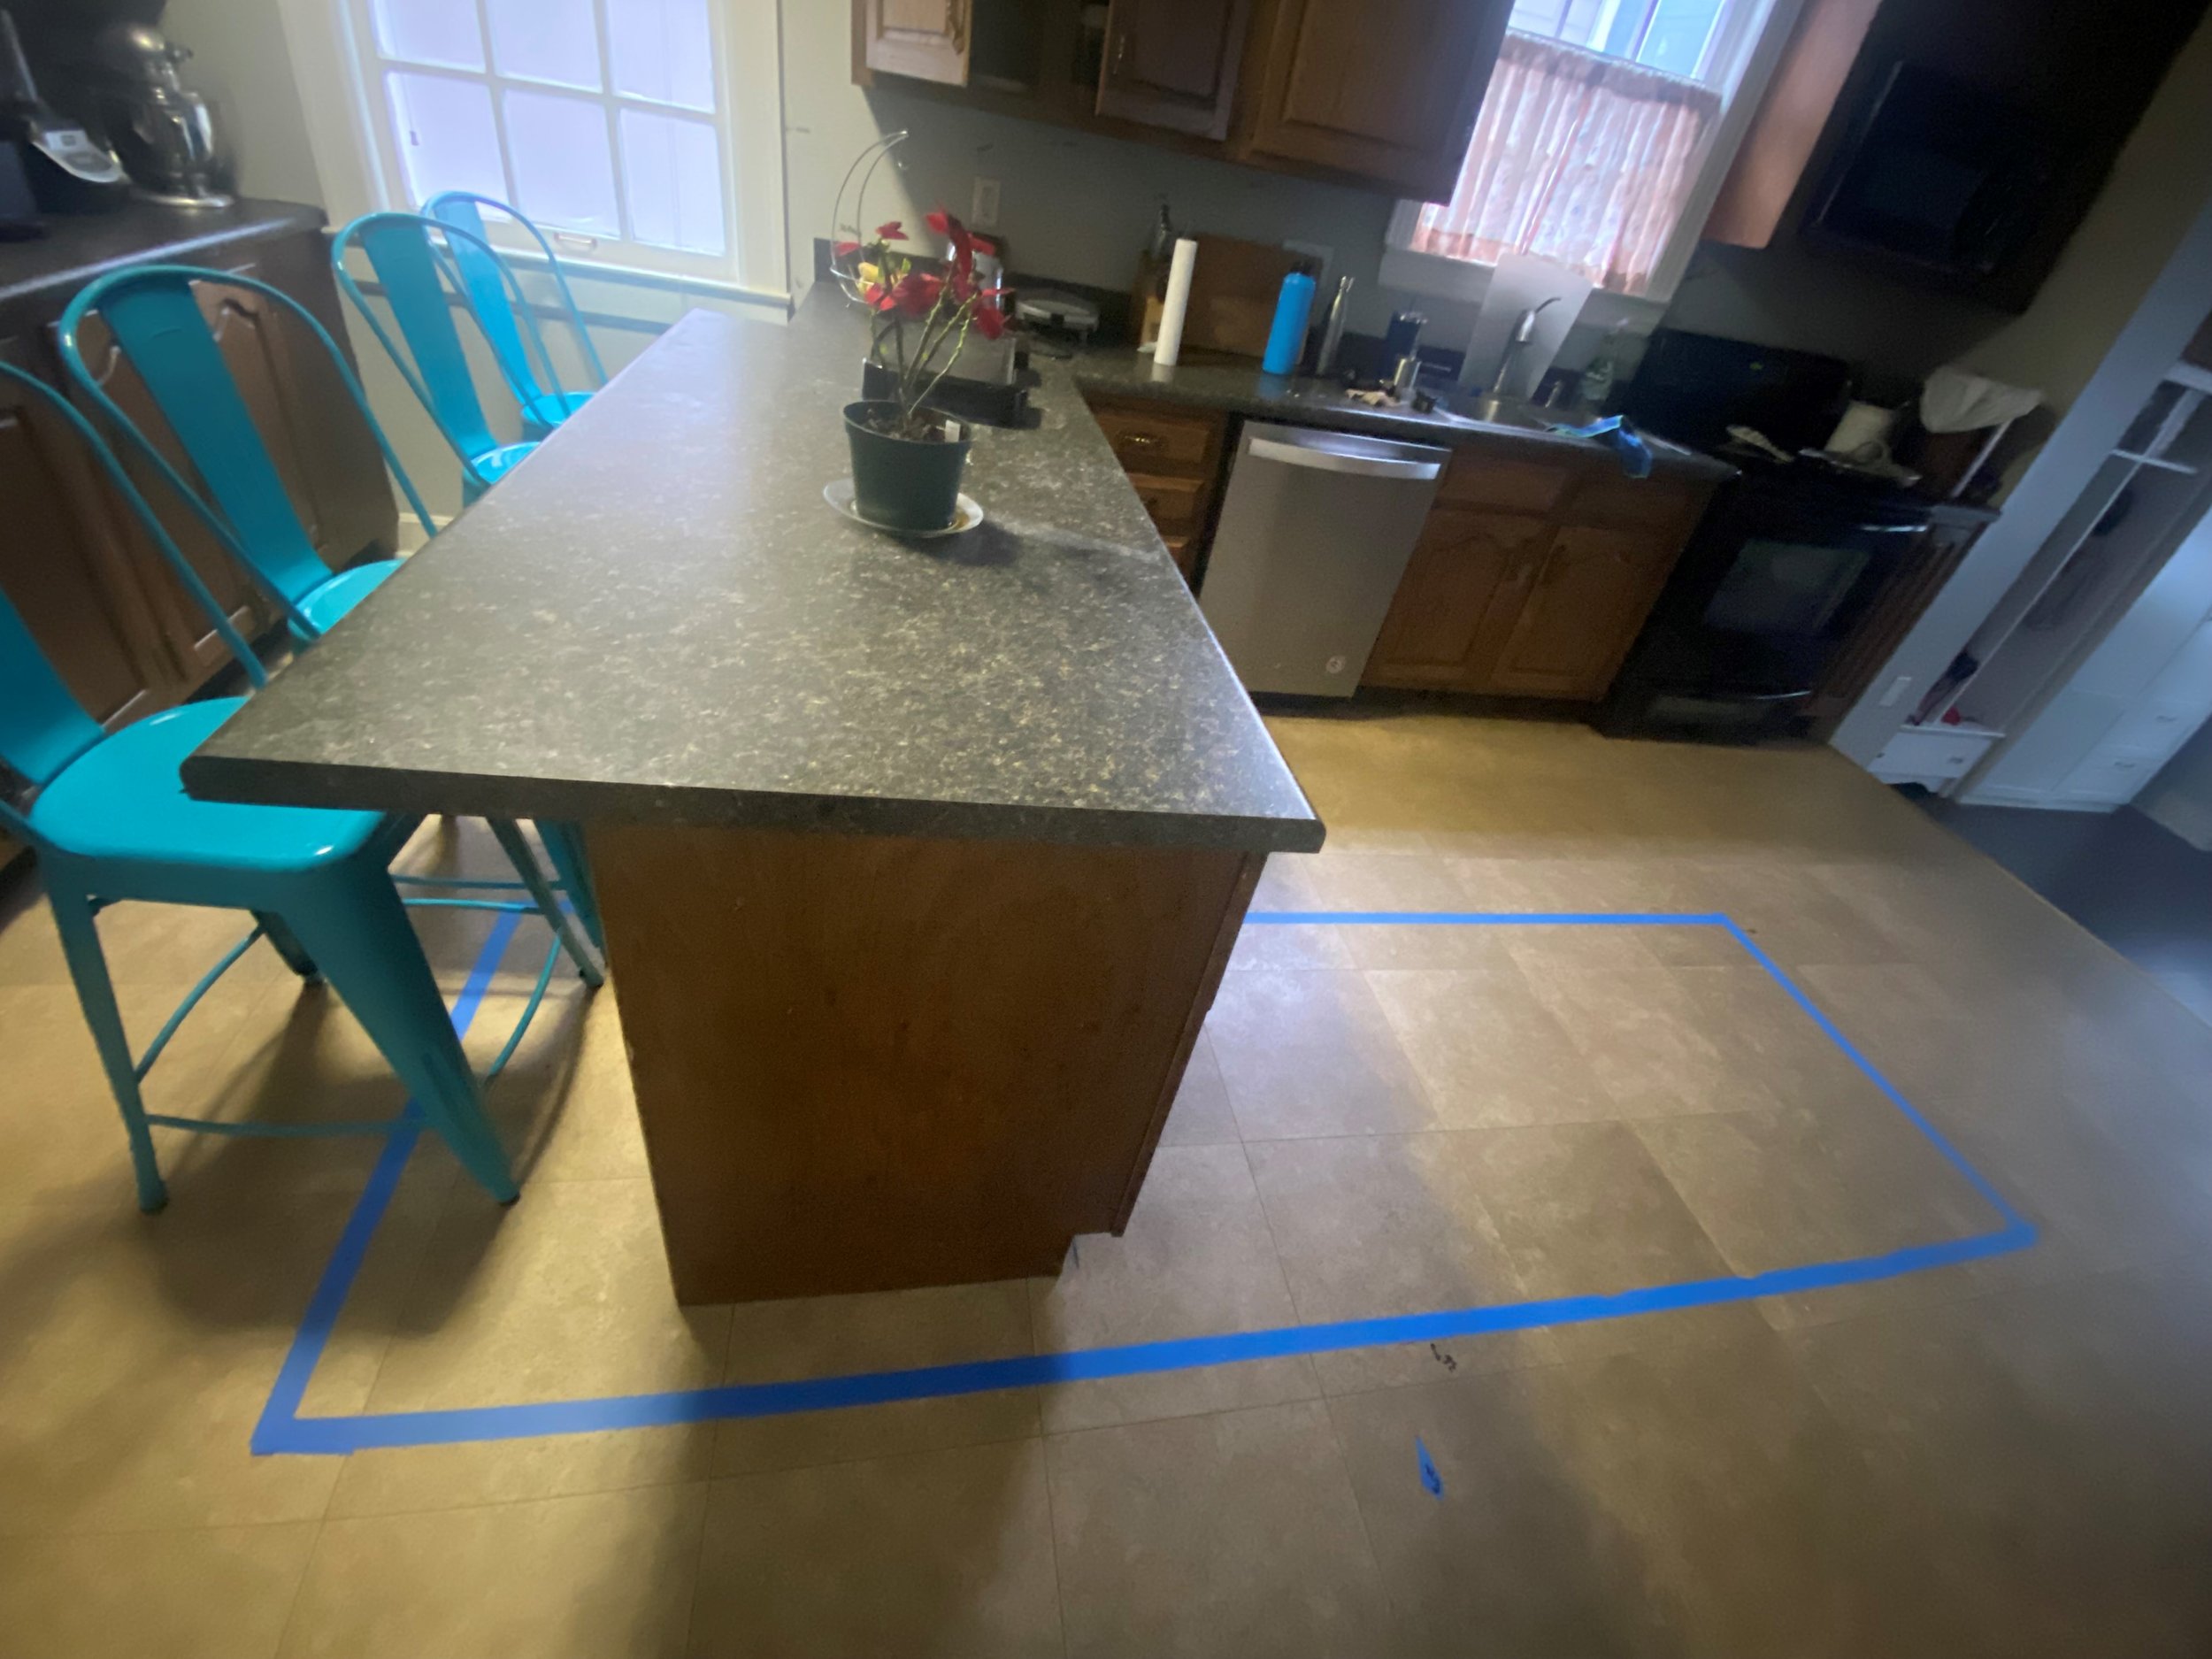
When we moved in, the walls were purple and the lighting was bad.

We had the kitchen painted and we lived with the rest, while I designed our future kitchen :)
The renovation


The biggest design change to the floor plan was opening the wall between the dining room and kitchen. We also closed a window, with 3 already in the dining room we had enough light. And the transformation to the space was amazing!


I decided to create a doorway with trim work on the new opening, like the rest of the house, respecting the architecture of my 100 year old home. From the kitchen you don’t see it but from the dining room you do.
The wall hides the side of the refrigerator cabinet from the dining room. I love how elegant the dining room remained.
(Teddy wanted to show you all the before construction views of the dining room :)
The design process


Removing any wall in a kitchen means less cabinets, creating a design that would fit all appliances and sink was a big challenge.
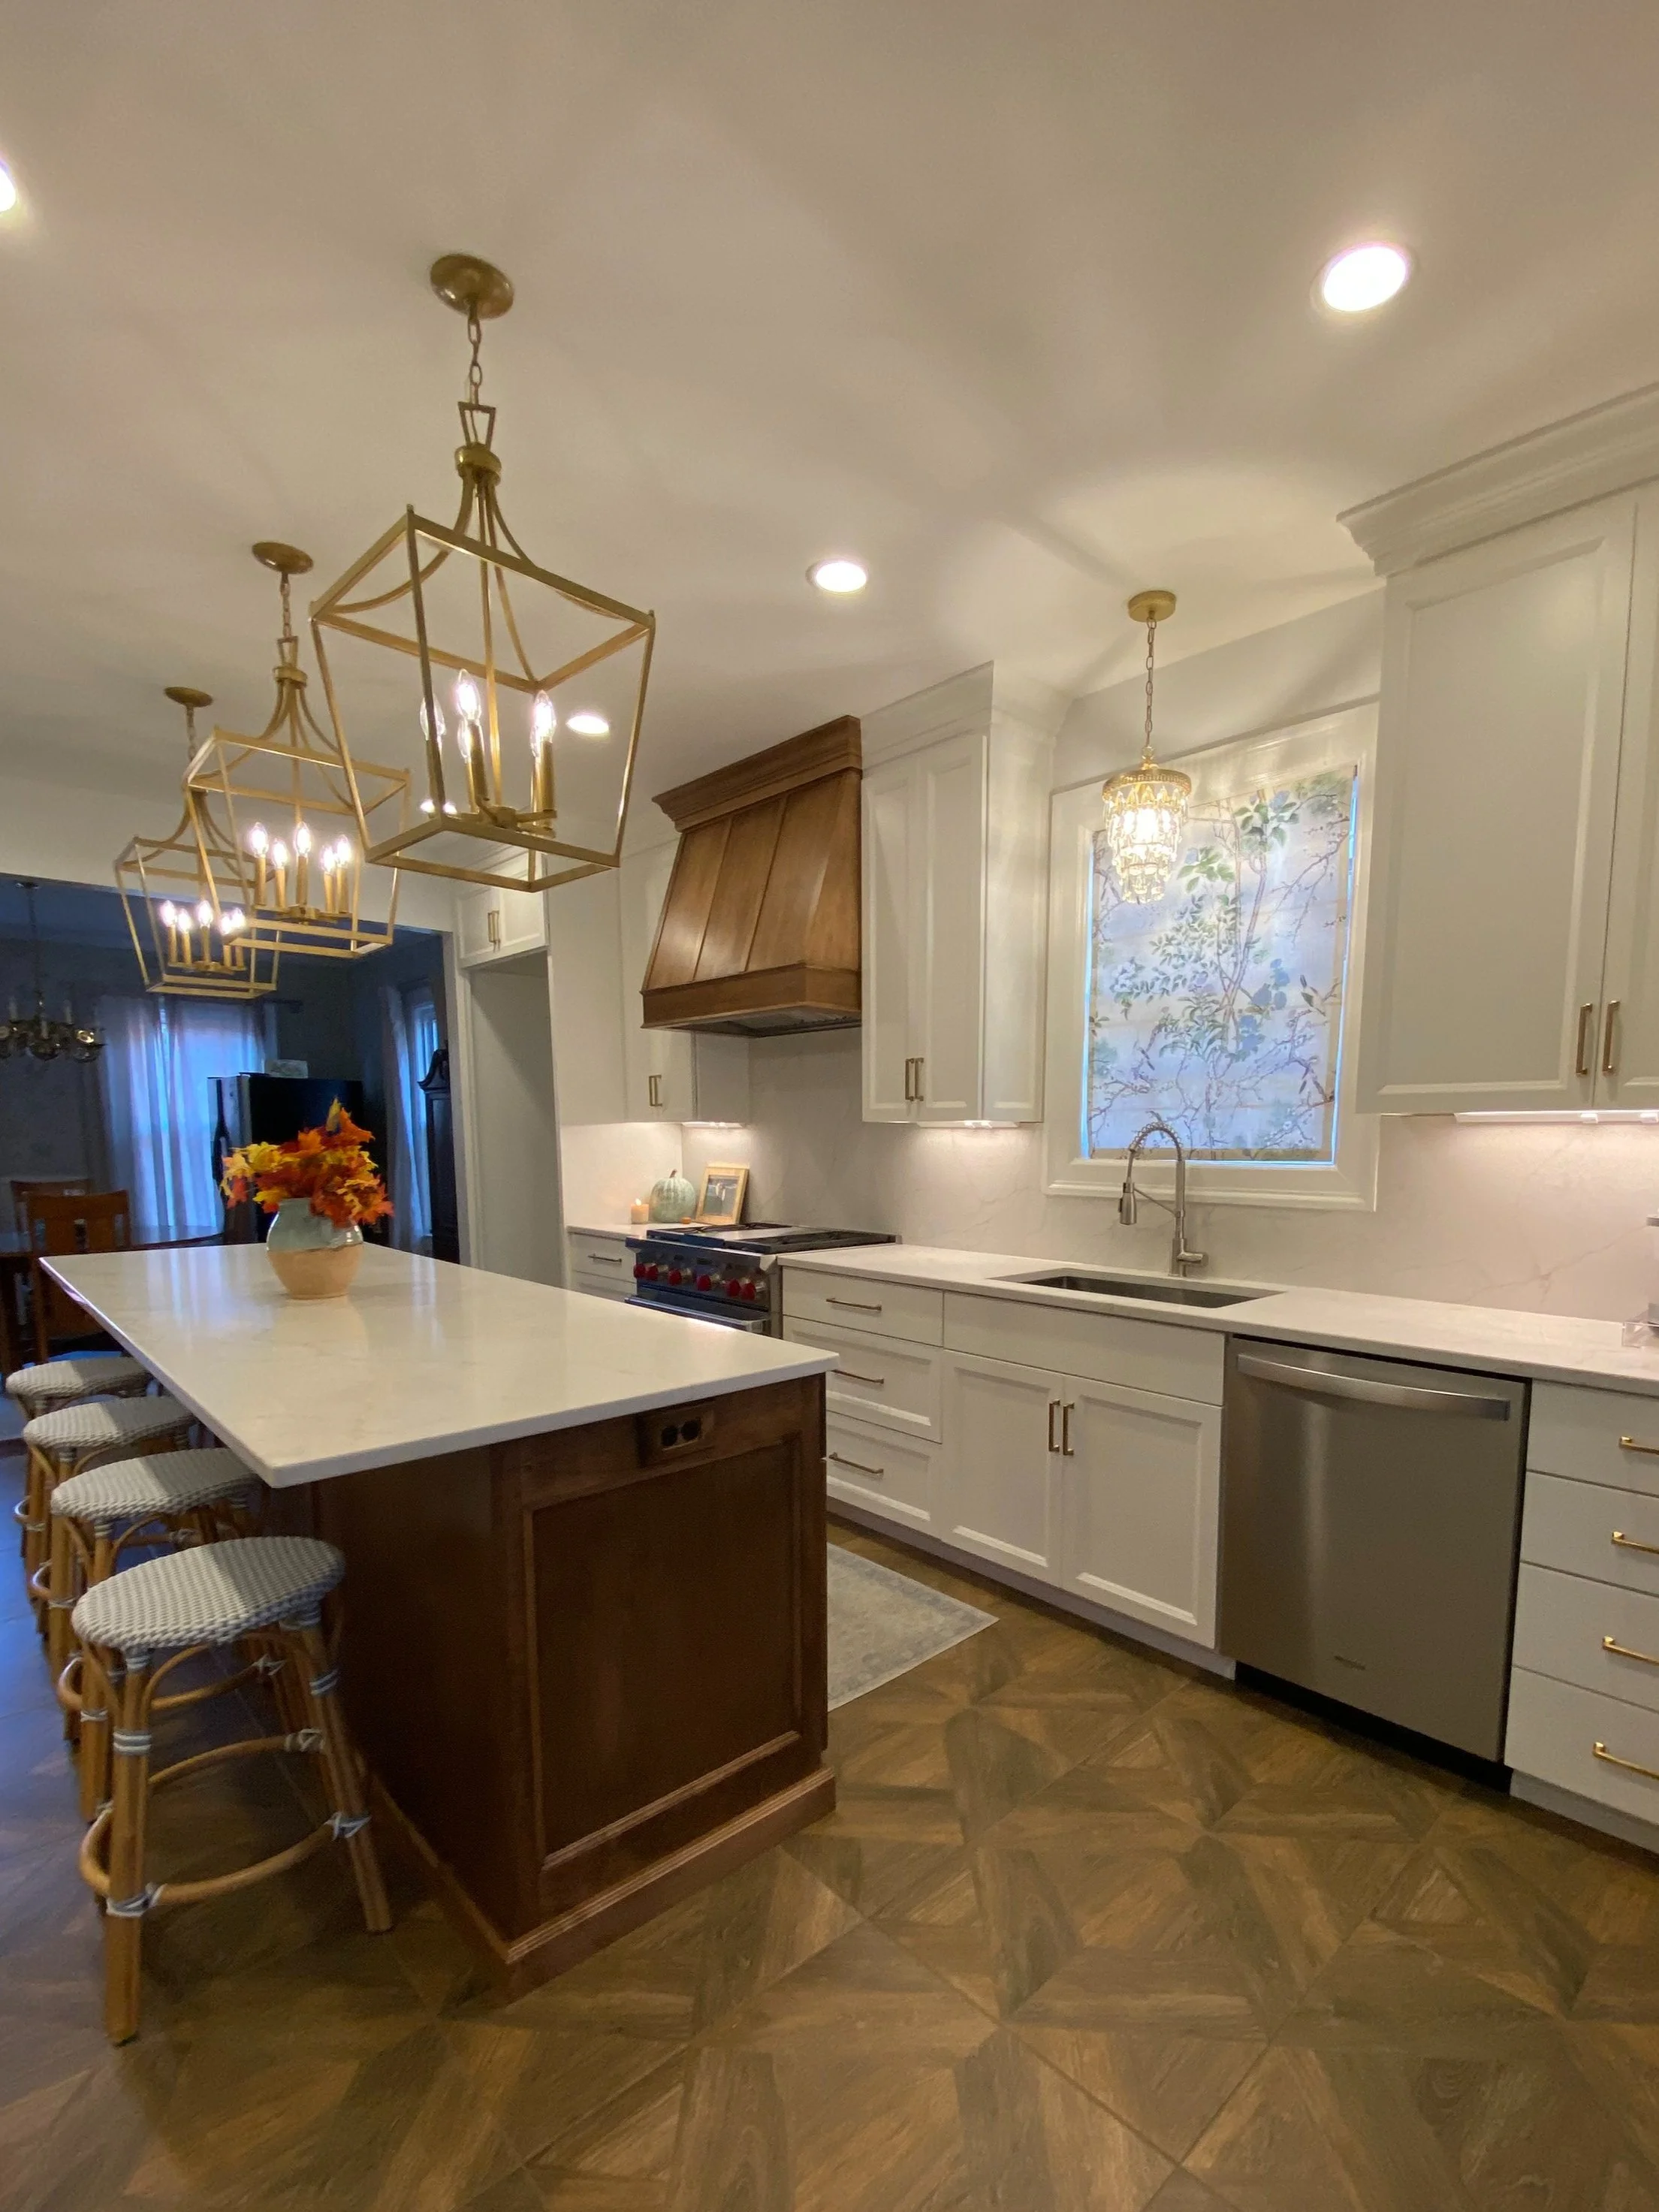
I started by closing a window, and making sure there was a focal point, the vent hood. Everything else was meticulously measured to fit and making sure each cabinet was functional. It’s a very hard working wall!


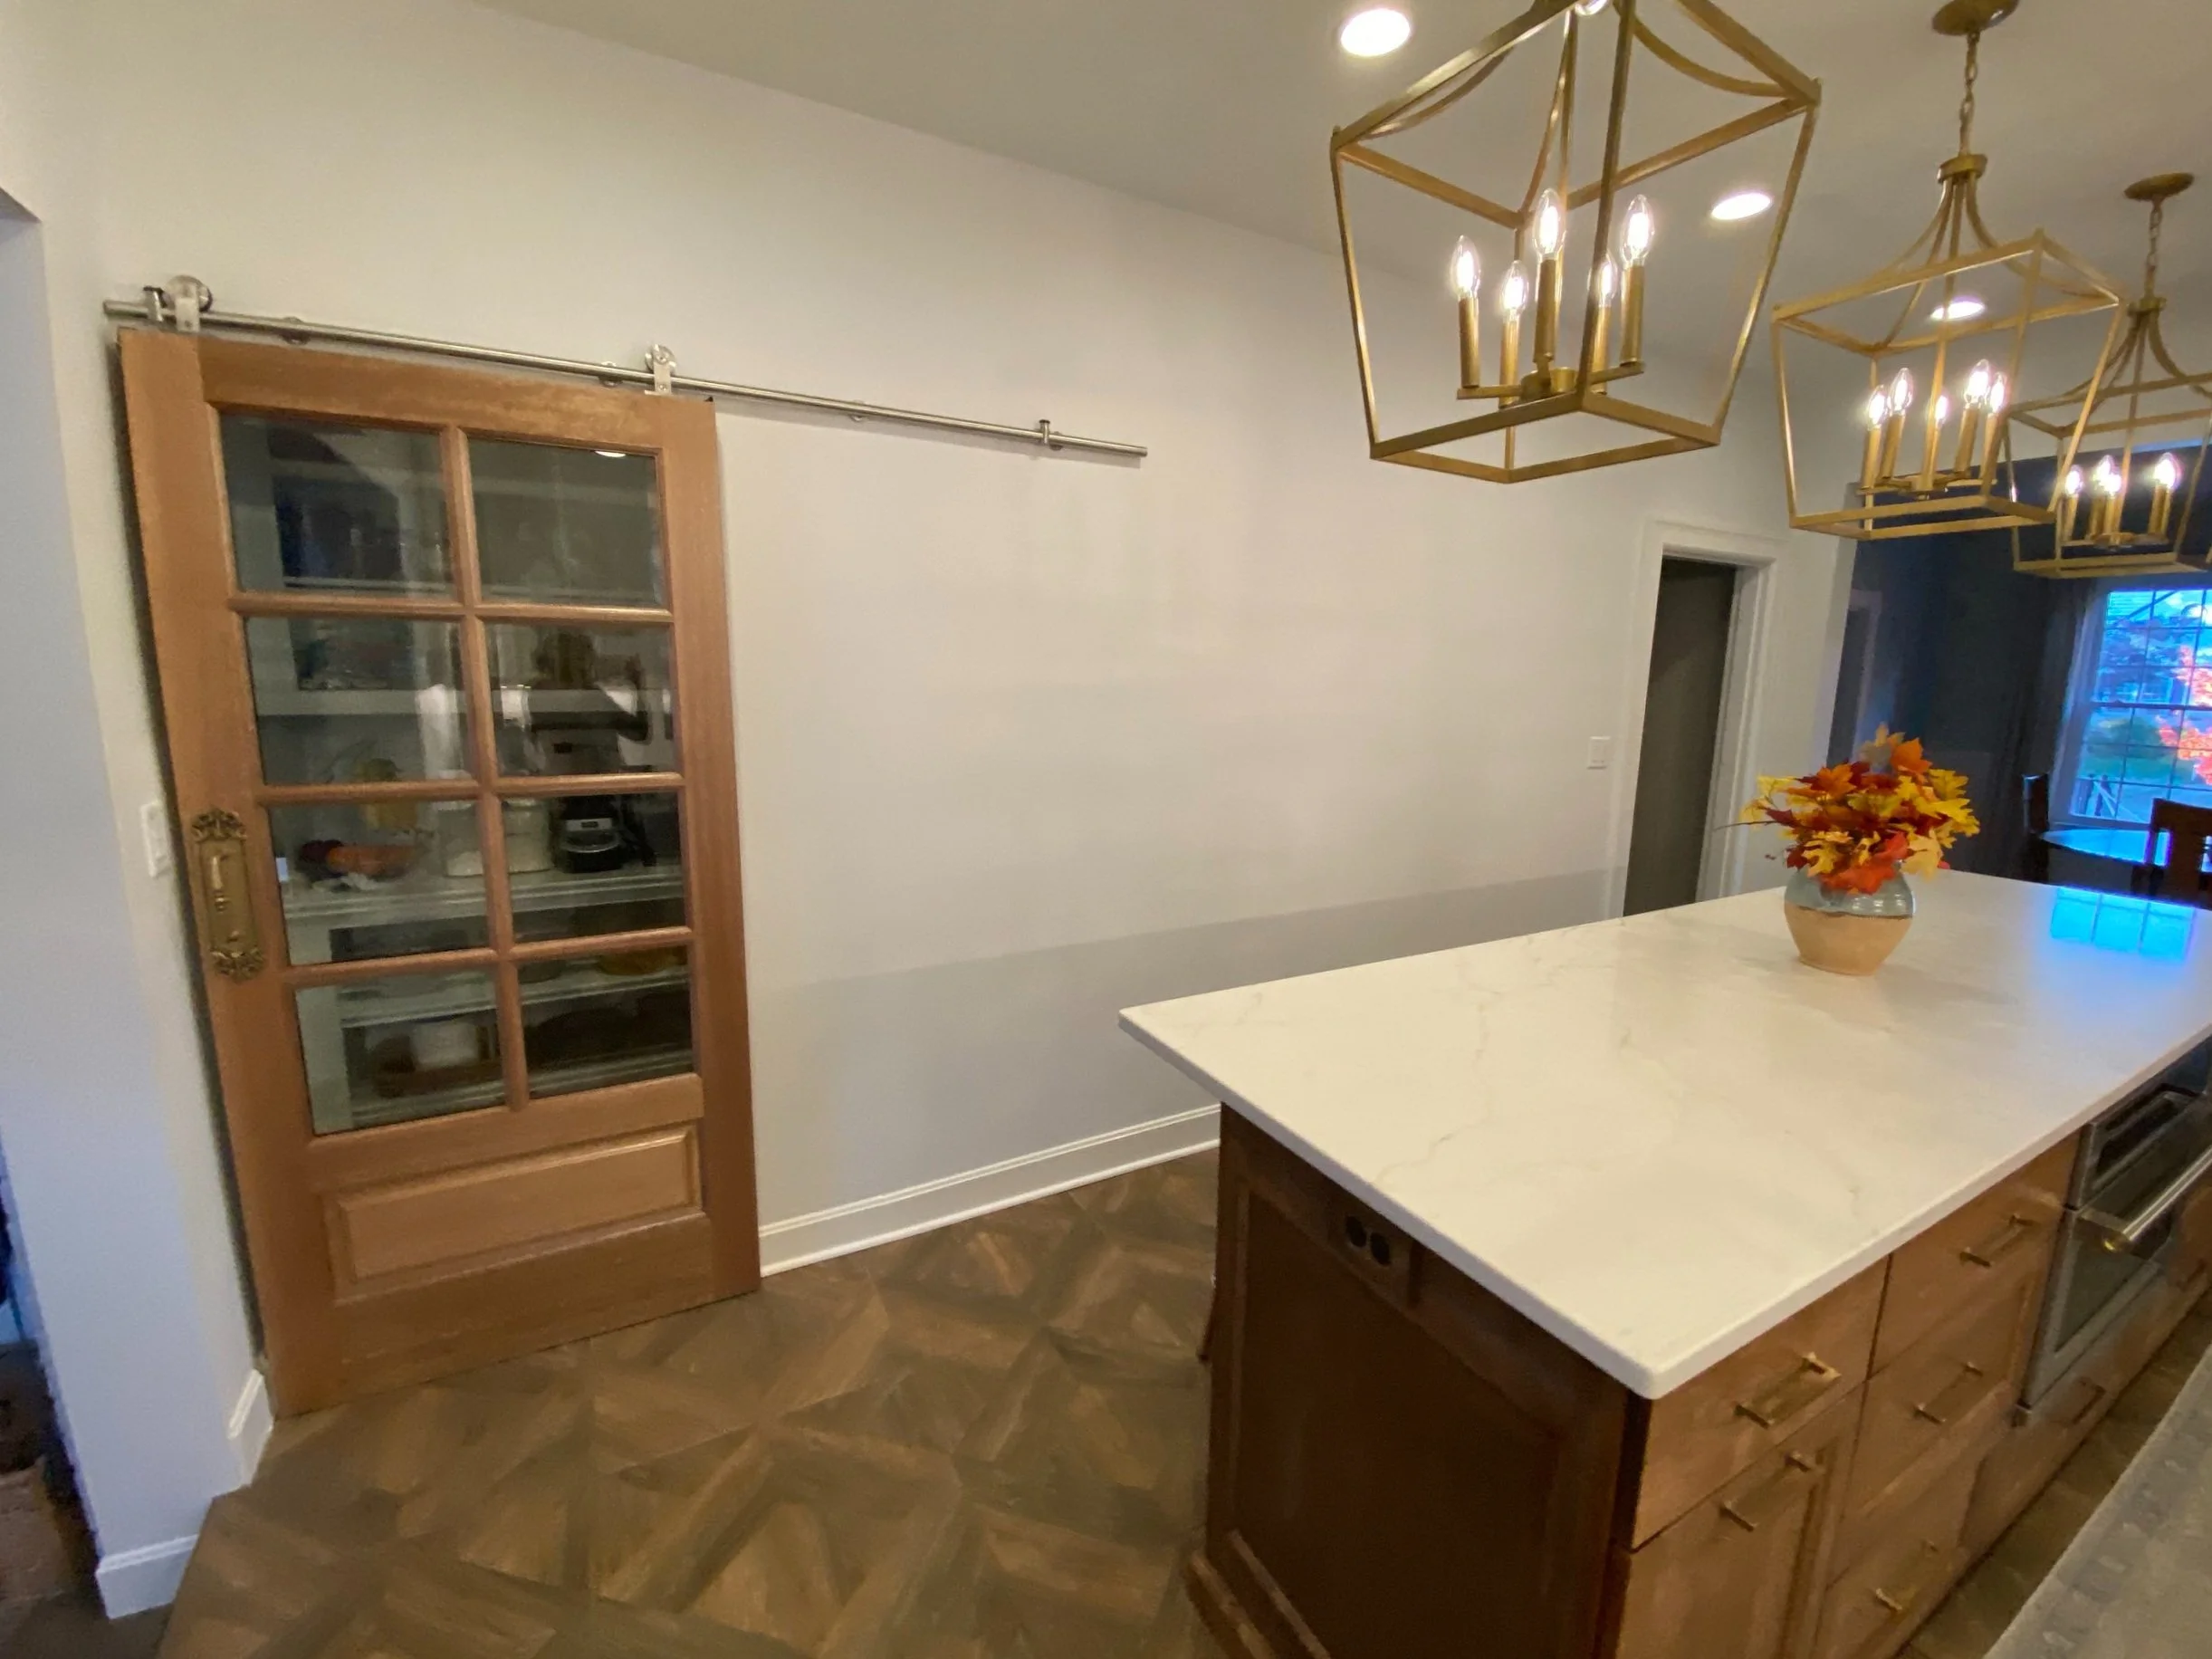
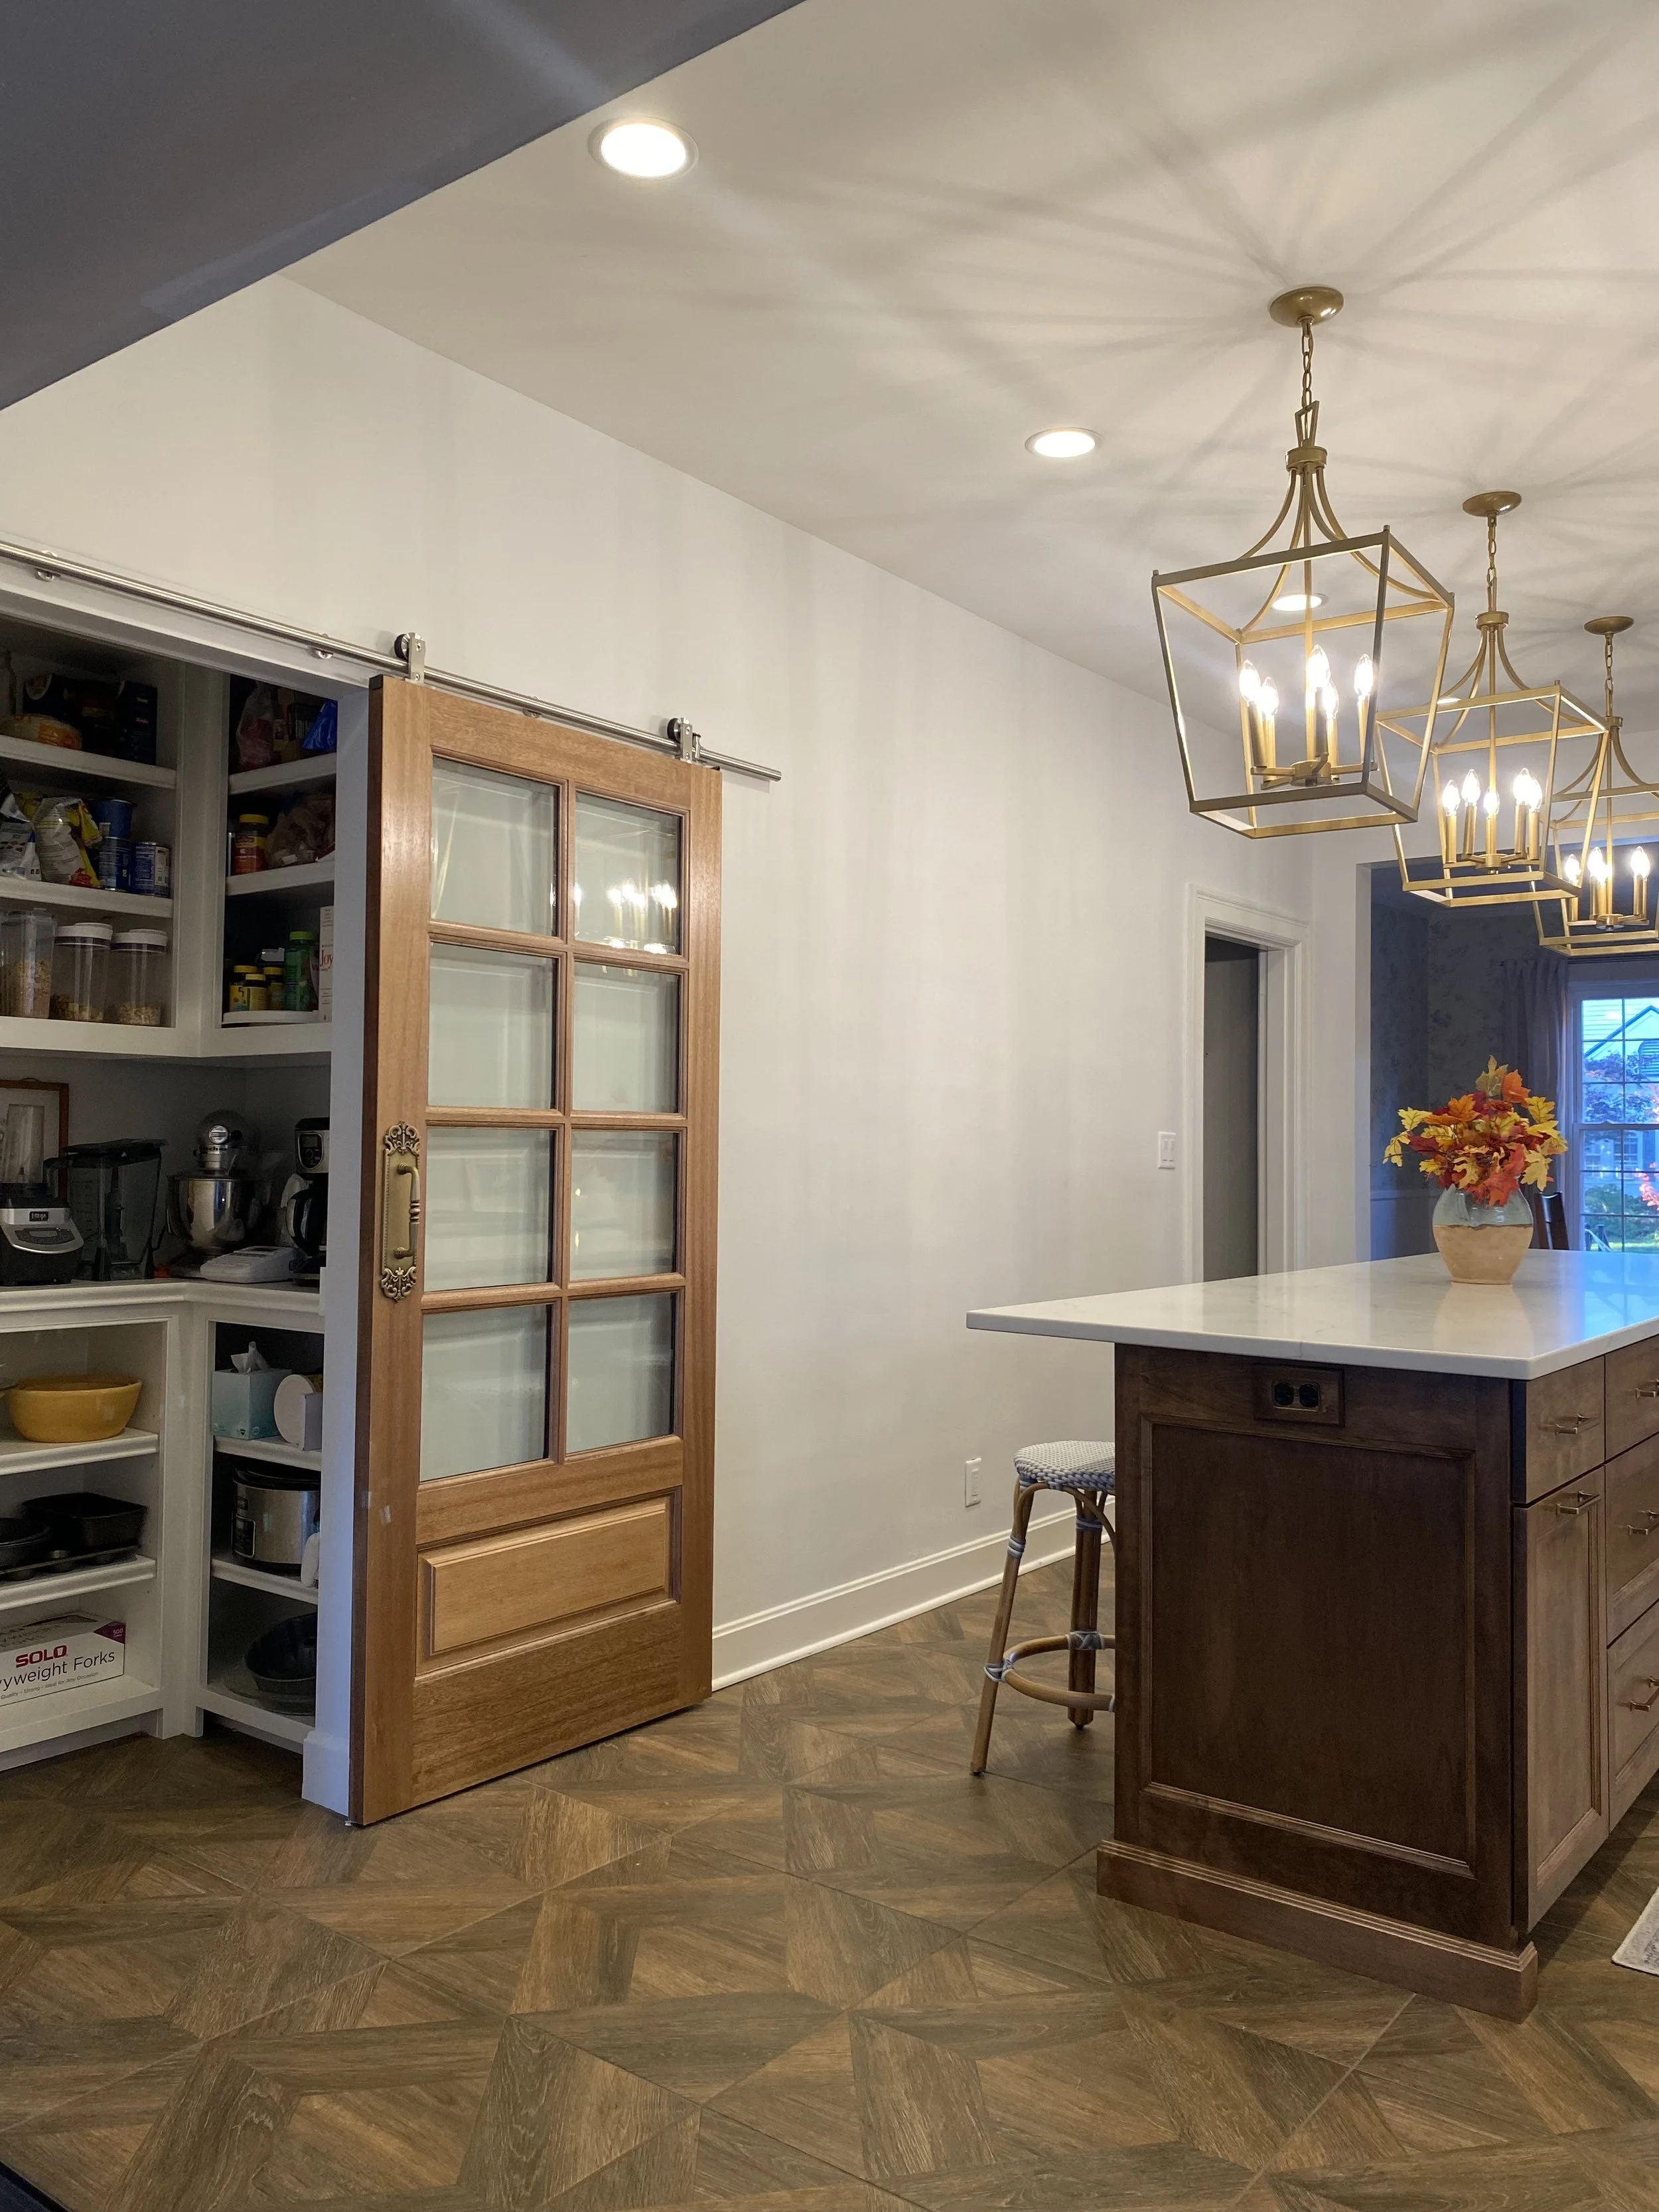


The kitchen floor plan I had to work with was narrow and long, we also really needed a pantry, so we moved the refrigerator to the opposite wall and added a sliding door in that space.
I designed the pantry with a mix of lower and upper shelves and a countertop for frequently used appliances. We really love how functional it is.


The other hard working space is the island, I was able to include all the storage we needed and more. It was carefully situated and measured to the inch, giving enough space for the seating and circulation, I selected backless stools to visually keep the space open, buy stools here.
The Finishes


I selected a soft white for the cabinets because I closed a window in the kitchen, even on cloudy days and without the lights on is not dark! To balance the cabinets I selected a wood island, range hood and pantry door, I love how the tones of the wood it adds a warmth to the space and go great with the gold on the pulls.
Bringing color is a nature inspired fabric for the roman shades with soft blues, greens and lavender, I’ll add this fabric somehow into the dining and living room in the future. Go to end of blog to shop the design board. Contact me to purchase fabric.

I selected a patterned wood-look tile, to contrast and not match the existing wood floor in the dining room. We also needed a very high traffic and water proof flooring.

The kitchen has lighting in layers, general ceiling LED cans, for all over lighting. I added 3 large island pendants, I wanted to create lots of drama here, the length of the island gave me the space so I went for it, it’s my favorite light to turn on other than the decorative glass pendant above the sink, my kids love this one because it “sparkles” I add magic where I can!
I also have the hardworking lights under the cabinets, I can plug in any appliance all along the wall. The pantry light is automatic which is a feature my contractor added and now I’ll add to any closet I design.

I selected a white based quartz with gold and silver veins for the countertops and I wanted a clean look with no grout lines for the backsplash, so I added the same quartz there too. It’s so easy to clean even after spills and sticky fingers.

For the island I added a clay vase with blue on it, and I change the foliage for each season.
I hope you enjoyed the tour of our new kitchen, lots of thought, great workmanship and hard work went into it! If you have any questions or are ready to renovate your home let me know at marumchenrydesign@gmail.com
Contractor: Stonehenge construction
Cabinets: M&H custom cabinets
Pictures: Maru McHenry